Mechanical Design
Chassis
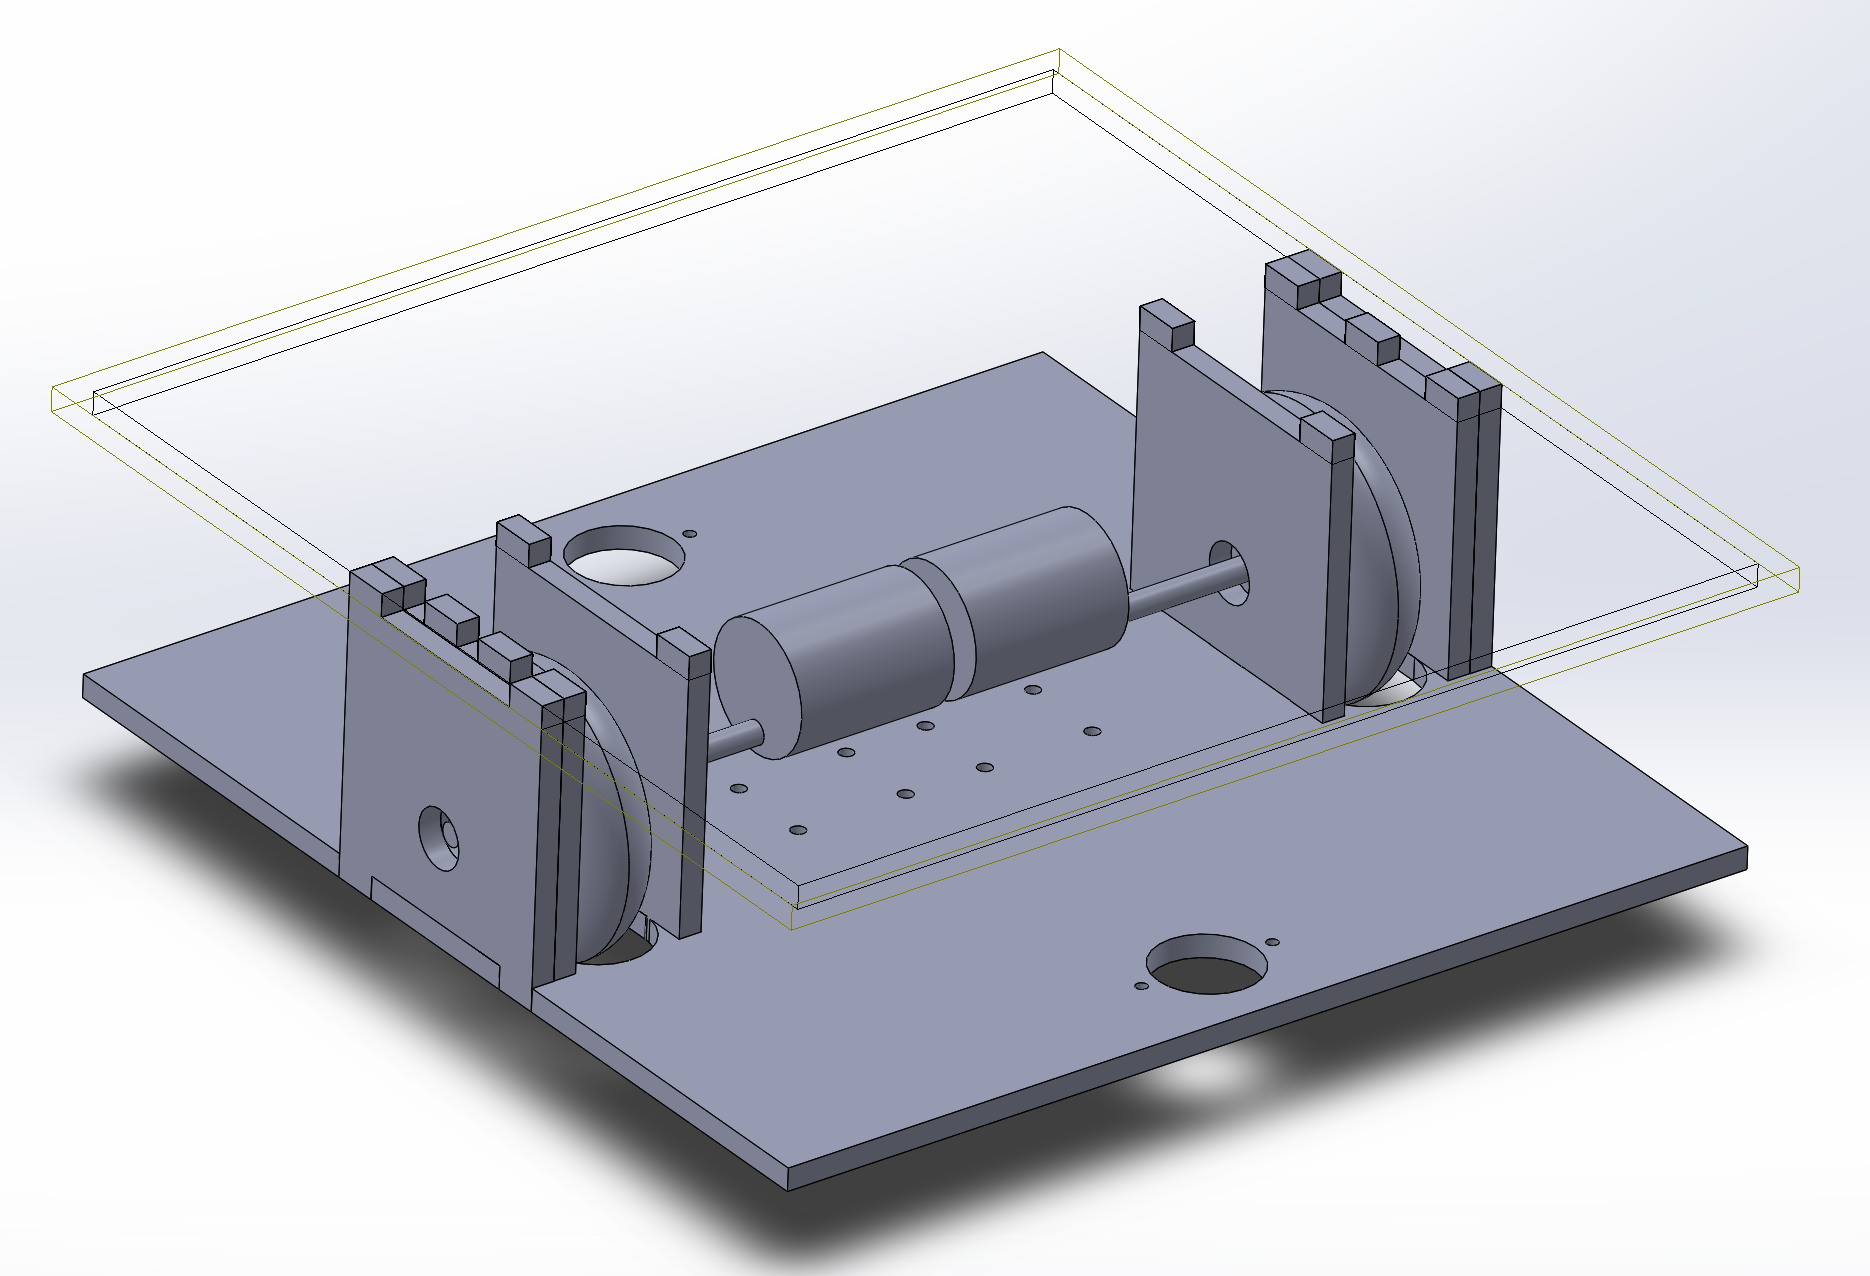
The warrior chassis consisted of 2 levels, the bottom level contained the drivetrain and most of the circuitry, the top level housed the launch mechanism. The shafts were mounted to the chassis via bearings which were mounted on the side plates seen in the image below. All components of the chassis were laser cut out of 0.25" Duron.
Drivetrain
The drivetrain set-up can also be seen in the image above. We chose a simple set-up for a quick build and to reduce the risk of malfunction. The motors were mounted using motor mounts from the lab store, and connected to the shaft using 6mm to 0.25" couplers. The shaft went through a bearing into the wheel, which was attached using wheel hubs, and into a second bearing. The bearings were placed to ensure that the load of the robot doesn't fall on the motors which aren't designed to take those loads. At the end of the bearing the magnet for the encoder was glued on and the encoder was mounted on the outside using stray pices of wood. Though the encoder ended up not being used in the code, the fact that we used encoders enabled us to make turns when wall riding and therefore ensured the success of the warrior in taking down multiple targets (in testing). Caster wheels were used in the front and back to stabilize the robot.
Launcher
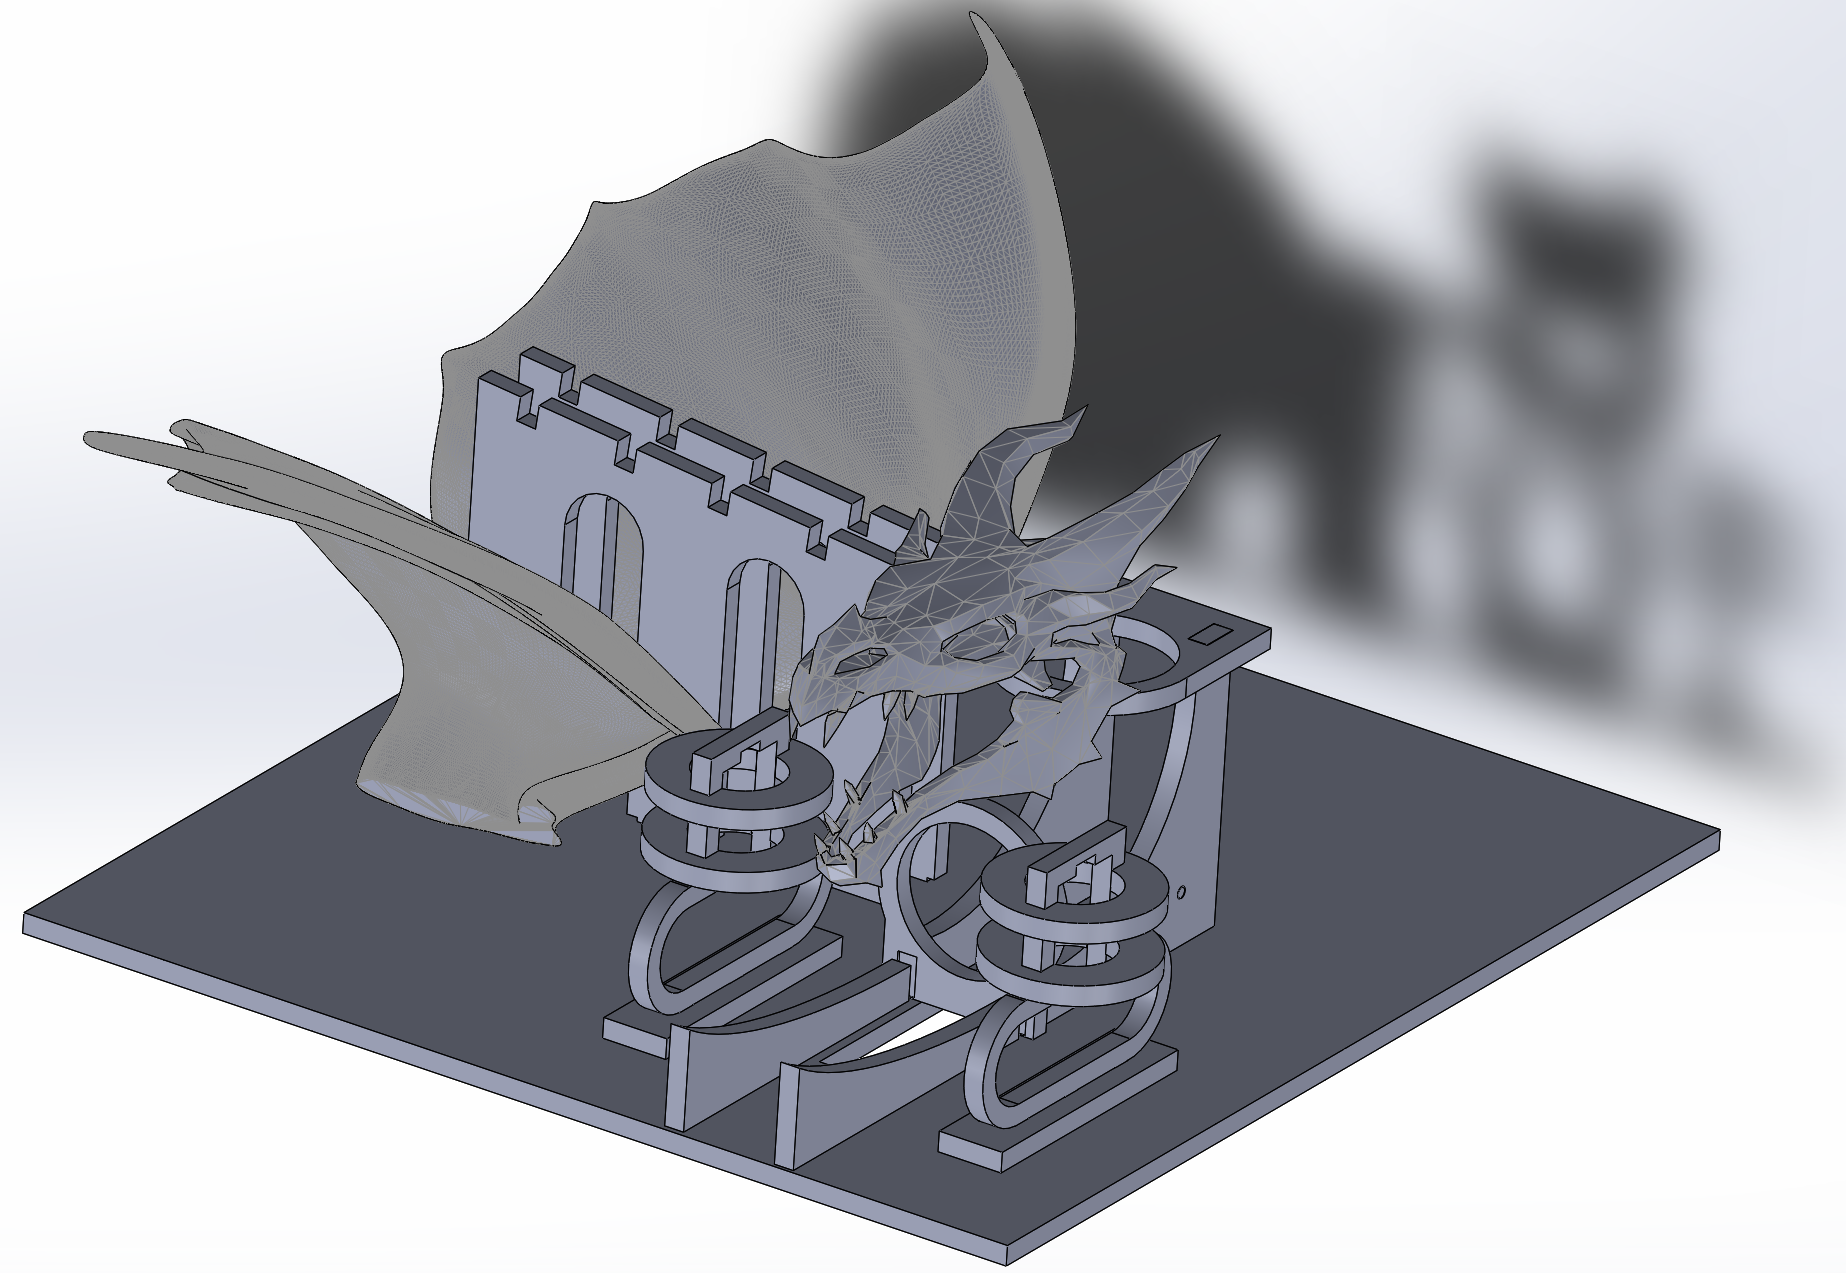
The initial launcher design was a catapult system driven by a solenoid. The advantages of this design were electrical simplicity and predictable ballis- tic dynamics. The disadvantages were mechanical complexity and uncertainty of mechanical capabilities of the solenoid. The launcher mechanism was designed, fabricated, and tested and found that the solenoid was unable to operate it effectively. This is likely due to the large moment of the catapult arm and friction between the actuator pieces. The launcher was modified by replacing the catapult launch mechanism with a flywheel. The flywheel system, while being simple, was incredibly effective in shooting down targets. In addition, thematic decorations were added to increase the robot’s aggressiveness and ferocity. The final design of the robot with the decorations can be seen below.